Unlock Tool for Motorola Moto E13 Frp Removal: Unlock the Frp of your device with ease!
Moto E13 Frp Remove Unlocktool/Motorola Moto E13 Frp bypass
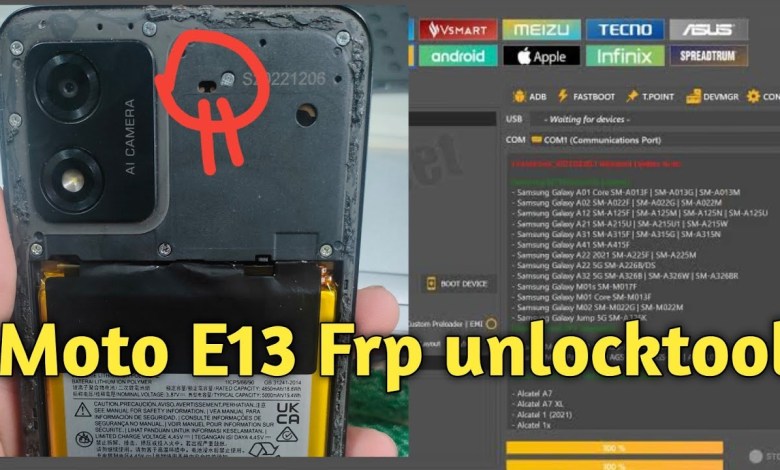
Hello friends, today I am going to show you how to remove the FRP lock from your Motorola Moto E13 very easily using a unlock tool. First, you need to open the back panel of your phone to access the test point. I already have the back panel of my phone open, so I will show you the test points.
First, I select the model of my Motorola E13, then I go to the SPDT since it is an SPD version. Now, I need to select the test point that matches with the model of the Motorola Moto E13 that you have. Once you select the test point, you need to connect it to the PC. I click FRP, then open the back shell of your phone. After opening the back shell, you will see a symbol like this.
This symbol represents your ideal point. Once you see this symbol, connect your phone to the PC. If your phone is not booting up, it means the bootloader has failed. In that case, try option number two, which is E20.
Next, select E20 and try again. If it still doesn’t work, try option two, which is E20. Now, we will hold the ideal point and keep it until you finish. Do not disconnect the ideal point until the process is complete. If the bootloader still fails, keep holding the ideal point.
If the bootloader still fails, hold the ideal point and then connect it. Keep holding the ideal point until one of the three options is disabled. If none of the options are disabled, keep holding the ideal point. Now, check if the FRP has been removed or not.
If the FRP has been removed, great! If not, you can see if the FRP protection has been removed or not. You can check this by opening your phone. I hope this video was helpful for you.
Now, you might be wondering why is this video script important and how you can use it to create a website article. By breaking down the video script into smaller sections and creating headings for each section, you can transform it into an informative article that provides step-by-step instructions for removing FRP lock from a Motorola Moto E13 phone.
Here is how you can structure the article using HTML headings:
How to Remove FRP Lock from Motorola Moto E13
If you own a Motorola Moto E13 and are struggling to remove the FRP lock, you are in the right place. Follow these step-by-step instructions to remove the FRP lock easily.
Step 1: Accessing the Test Point
To begin, you need to open the back panel of your phone to access the test point. Make sure you carefully follow the instructions to avoid damaging your phone.
Step 2: Selecting the Model and Version
Once you have accessed the test point, select the model and version of your Motorola Moto E13. This will help determine the best approach to removing the FRP lock.
Step 3: Connecting the Test Point to the PC
After selecting the model and version, connect the test point to your PC. This will initiate the process of removing the FRP lock from your phone.
Step 4: Checking for Ideal Point
Check for the ideal point symbol after opening the back shell of your phone. This symbol indicates that the FRP lock has been successfully removed.
Bootloader Failure
If the bootloader fails, try option two, E20, and hold the ideal point until the process is complete. Do not disconnect the ideal point until the bootloader issue is resolved.
Step 5: Verifying FRP Removal
After following the steps, check if the FRP lock has been successfully removed from your Motorola Moto E13. If not, repeat the process until the FRP lock is removed.
Conclusion
Removing the FRP lock from your Motorola Moto E13 is a simple process that can be done using an unlock tool. Follow the step-by-step instructions provided in this article to successfully remove the FRP lock from your phone.
By structuring the article with HTML headings, you can make it more readable and user-friendly. This will help your readers easily follow the instructions and successfully remove the FRP lock from their Motorola Moto E13 phones.
#Moto #E13 #Frp #Remove #UnlocktoolMotorola #Moto #E13 #Frp
