Unlocking Secrets: How to Bypass Google Account on Vivo Y20S & Y12S Without a PC—You Won’t Believe the Simple Steps!

part 4 bypass akun google vivo y20s y12s tanpa pc
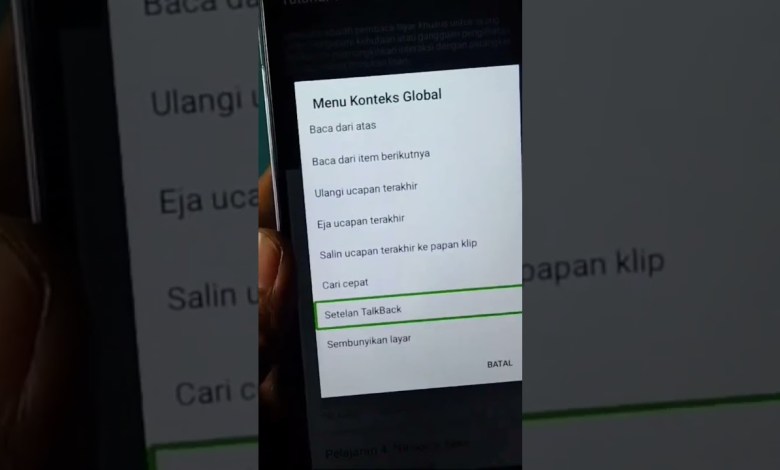
Understanding the Touchback Menu in Android: A Guide
In today’s digital landscape, accessibility features play a crucial role in ensuring that everyone can effectively use their devices. One such feature in Android is the Touchback menu, which enhances navigation for users. This article will guide you through the steps to activate and configure the Touchback feature, ensuring you can fully utilize your Android device’s capabilities.
Activating the Touchback Menu
To begin using the Touchback menu, you need to activate a few settings on your Android device. Let’s break down the steps clearly:
Step 1: Volume Buttons Configuration
Start by pressing the volume buttons on the side of your device. You need to adjust the volume down and then the volume up again to enable the Touchback feature. This activation will initiate the Touchback menu, allowing for further customization.
Step 2: Drawing the Letter ‘L’
Once the Touchback menu is active, you’ll need to draw the letter ‘L’ quickly on your screen. This gesture serves as a confirmation method for entering the next settings phase. Drawing ‘L’ accurately is key, as it signals the device to move forward.
Step 3: Accessing the Touchback Settings
After you have successfully drawn the letter ‘L’, it’s time to navigate to the Touchback settings. This step is essential to customize how the feature works according to your preferences.
Clicking on the Settings
To click into the settings, utilize the Touchback feature by tapping once on the screen. This single tap confirms your entry into the settings menu, which is crucial for further adjustments.
Step 4: Finding Developer Options
Now, within the settings, you’ll be looking for the Developer Options. This part of the setup can be a little tricky, but don’t worry; we’ll guide you through it:
Scrolling the Settings Menu
To locate Developer Options, you will need to scroll down the settings menu. For this activity, it is important to use two fingers to ensure an effective scrolling experience. Using one finger may not provide the desired results, and you may find it difficult to reach the Developer Options.
Configuring Developer Options
Once you are in the Developer Options menu, several settings can be adjusted to enhance your device’s performance and usability.
Step 1: Understanding Developer Options
Developer Options are primarily meant for app developers. However, these options also allow users to customize their devices. From tweaking animation scales to enabling USB debugging, understanding these options can significantly improve your device experience.
Step 2: Enabling USB Debugging
One of the most useful settings in Developer Options is USB Debugging, which allows your device to communicate with a computer for various functions. To enable this feature:
- Locate the USB Debugging option within Developer Options.
- Toggle the switch to enable it.
- Confirm any prompts that may appear.
Step 3: Adjusting Animation Scales
Another essential feature available in Developer Options is the ability to adjust animation scales. If your device feels sluggish, reducing or turning off animation can significantly improve responsiveness.
- Look for the ‘Window animation scale’, ‘Transition animation scale’, and ‘Animator duration scale’ settings.
- Set them to your desired levels – remember, lower values mean a snappier experience.
Final Touches
After configuring your Developer Options and the Touchback feature, it’s vital to test how everything works. Experiment with different gestures and settings to see what suits you best.
Testing the Touchback Functionality
- Open various applications to see how Touchback performs.
- Practice drawing the ‘L’ gesture to ensure it works consistently.
- Adjust settings as needed based on your experience.
Revisiting the Settings
If you find that certain adjustments need to be modified, don’t hesitate to revisit the settings. The beauty of modern smartphones lies in their flexibility and customization.
Conclusion
By following these steps, you can effectively activate and configure the Touchback menu on your Android device, enhancing your overall user experience. While accessibility features might seem daunting at first, understanding their functionalities can empower you to use your device more efficiently. Always remember to explore and practice with different settings until you find what works best for you.
This guide serves as a starting point for unlocking the full potential of your Android device through the Touchback feature and Developer Options. With a little patience and practice, you’ll become proficient and enjoy a smoother, more accessible experience. Happy navigating!
#part #bypass #Google #Vivo #Y20S #Y12S #account


