

Redmi K40 Gaming Frp Bypass Without Pc 2025 | Android 13 MIUI 14 | Unlock Google Account Redmi K40
Redmi K40 Gaming FRP Bypass Instructions
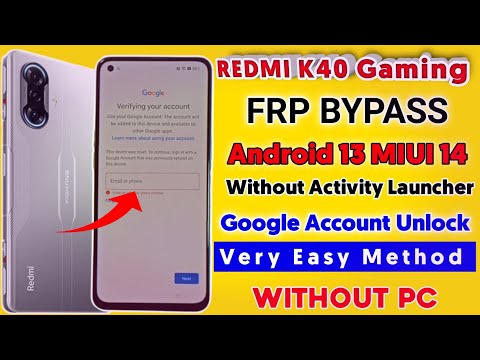
Hello guys, welcome to my channel! Today, I have the Redmi K40 Gaming mobile with me. In this article, I will guide you through the process of bypassing the Factory Reset Protection (FRP) on this device. If you haven’t subscribed to my channel yet, please do so and don’t forget to click the bell icon to stay updated with my latest posts!
Getting Started with Setup
Step 1: Language Selection
The first step is to choose your preferred language. Once you have selected your language, click on Next.
Step 2: Country Selection
Now, you need to select your country. After choosing your country, click on Next.
Step 3: Language and Keyboard Preferences
After selecting your language and keyboard preferences, click on Next again.
Step 4: Accept Terms and Conditions
Next, check the terms and conditions and click on Next.
Step 5: Internet Connection
At this point, you should skip the setup for the next tab. Click on Next. Now, connect your device to any internet connection, either via Wi-Fi or mobile data. Once connected, click on Next.
Step 6: Choose Not to Copy Data
You will now come to a page where it asks if you want to copy data over to this device. Click on Don’t Copy.
FRP Bypass Process
Checking for Pattern Lock and Gmail
At this point, you will see that the device has a pattern lock and that the Gmail account is also not accessible. This is where we will start the bypassing process.
Step 7: Accessing the Keyboard Selection Page
Revisit the keyboard selection page where we can start working on the bypass.
Step 8: Enabling TalkBack
Hold the Volume Up and Volume Down buttons simultaneously to enable TalkBack. Keep holding both buttons for a few seconds. You will see that the TalkBack feature has been activated.
Step 9: Closing TalkBack
Now, double-tap on the Close option. First, click to select the option, and then double-tap to confirm.
Step 10: Navigating Back
You will need to take one step back. After selecting the option, double-tap again.
Step 11: Disabling TalkBack
Before you proceed, press and hold the Volume Up and Volume Down buttons simultaneously again to disable TalkBack.
Step 12: Accessing the Braille Keyboard
Click on Next, and you will see that the TalkBack Braille keyboard is now open. Select this new keyboard option and click on Next.
Step 13: Continuing Setup
At this point, continue to click Next until you reach the screen where you can scroll down and choose to add a network.
Step 14: Adding a Network
Now, you will need to add a network. Make sure to do this in English for better accuracy.
Completing the Bypass
Conclusion
By following these steps, you will successfully bypass the FRP on the Redmi K40 Gaming device. Make sure you follow the steps closely and do not skip any of them to ensure a smooth bypass process.
If you find this article helpful, please like, share, and subscribe to my channel for more such tutorials! Thank you for watching, and I hope to see you in the next video!
Final Thoughts
Bypassing FRP can seem daunting at first, but with proper guidance, it becomes a straightforward process. Always remember to adhere to ethical practices when handling devices, and ensure that you have the legal right to bypass any security features. Happy customizing!
Feel free to explore my other videos for more tech tips and tricks. If you have any questions or need further clarification, don’t hesitate to leave a comment below.
Thank You!
Thank you for your time, and have a great day!
#Redmi #K40 #Gaming #Frp #Bypass #Android