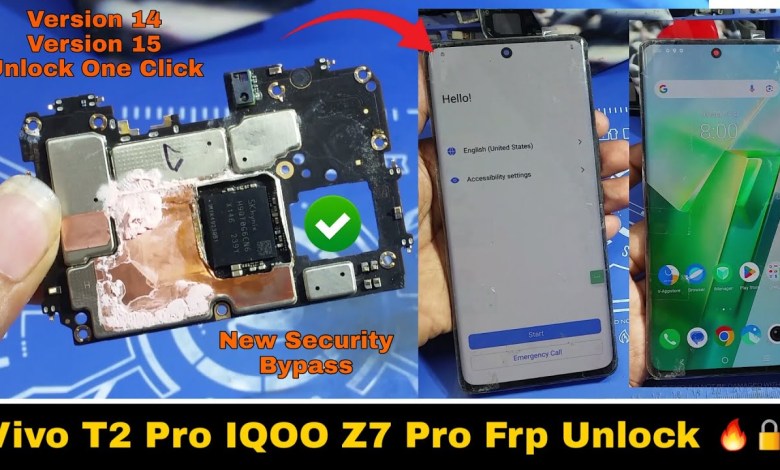
Unraveling the Mystery: Why Hard Reset Isn’t Working on Vivo T2 Pro & IQOO Z7 Pro FRP Issues

Vivo T2 Pro IQOO Z7 Pro | Hard Reset Not Warking | Frp Bypass New Security| V14 V15
Vivo T2 Pro Phone Repair Guide: Bypassing FRP
Introduction
Hello everyone! In today’s video, we’re diving into a repair case that came into our shop. We have a Vivo T2 Pro phone, which has some interesting similarities with the IQ Z7 Pro model. Both models are manufactured by Vivo, and they share the same software environment.
Understanding the Issue
The device in question has an FRP (Factory Reset Protection) lock enabled. You can see here that the offline setup option is not available. This phone was received from another technician who has already attempted to bypass the FRP lock. Unfortunately, those attempts were unsuccessful, and the FRP remains intact.
Today’s video focuses on a specific method: we will demonstrate how to remove the UFS (Universal Flash Storage) IC from the device to bypass the FRP lock.
Tools and Preparation
To begin, we have prepared the phone for repair by making precise cuts around the area where the UFS IC is located. This step is crucial for us to access the component properly without causing damage to other parts of the device.
Equipment Used
Before we proceed, let’s talk about the essential tools:
- Microscope: This allows us to see the components clearly for a more accurate and precise extraction.
- Hot Air Rework Station: We are using the Quick 857 DW Plus for this job. The temperature is set to 330 degrees Celsius. Adjust the airflow based on your preferences—setting it to one or two will suffice.
Step-by-Step Process
1. Inspecting the UFS IC
Now that we are under the microscope, we can clearly see that the UFS IC is from the SK Hynix brand and is coated with white paste. The white paste serves to help the IC stick better, but for our procedure, we need to carefully cut through this adhesive.
2. Cutting the White Paste
Using a precise cutting tool, gently slice through the white paste around the UFS IC. Make sure to be very careful during this step to avoid damaging the IC or other surrounding components.
3. Heating the UFS IC
Once the adhesive is removed, we will use the hot air rework station to apply heat directly to the UFS IC. This will soften any remaining solder and make it easier to remove the IC.
- Temperature: Keep the device at 330 degrees Celsius.
- Airflow: Set to a low level to maintain control over the heating process.
4. Removing the UFS IC
Using a specialized tool, gently lift the UFS IC from its position. Be patient and ensure that you do not rush this process. If needed, apply more heat if the IC does not come off easily, but be cautious not to overheat and damage the underlying board.
5. Clean the Area
After the IC is successfully removed, there may be some residual solder or adhesive on the motherboard. Use a cleaning tool to tidy up the area, ensuring it is ready for the installation of a new or replacement UFS IC if necessary.
Conclusion
Today’s procedure illustrated how to bypass the FRP lock by removing the UFS IC on a Vivo T2 Pro device. It’s essential to follow these steps with precision and care to avoid damaging the components.
Repairing mobile phones can be a rewarding process when done correctly, and understanding these techniques empowers technicians to overcome software locks effectively.
Final Thoughts
If you found this video informative, please consider liking and subscribing. Your support helps us to create more such educational content. Have any questions or suggestions? Feel free to drop them in the comments below.
Thank you for watching, and stay tuned for the next tutorial!
This repair guide is aimed at technicians and beginners interested in mobile phone repairs. Always practice safety and ensure you’re using the right protective gear and tools. Happy repairing!
#Vivo #Pro #IQOO #Pro #Hard #Reset #Warking #Frp


